Please note that for this demonstration I have increased the size of the textures by 1600% so you can see them better.
First off, the base map:

The base, or diffuse, map determines the basic colors of a texture, all the dungeons and other places show so far are only using a base map. The one above (level1_blue_tile) gives the impression of blue stones set together in a pattern.
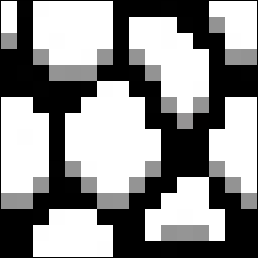
Next is the Bump map:

The Bump map is a gray scale image used to add depth to a texture. White areas will appear to be raised, while black areas will appear sunken, you can control how raised or sunken an area appears with lighter or dark shades of gray, the lighter the shade, the higher it will appear. Notice I made the tops of the stone pure white, the edges of the stones gray, and the cracks between the stones black, as seen in the shader test, this makes the cracks seem to sink into the floor.
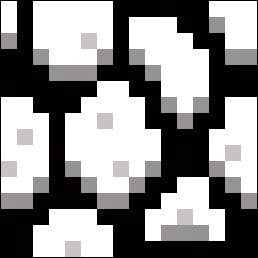
Next is the Specular map:

The Specular map is another gray scale image, this one controls how shiny a texture is. Just like with the bump map, lighter areas are shinier then darker areas. Here I made the tops of the rocks shiny, the edges kinda shiny, and the cracks not shiny at all, I also made the darker areas on the top of the rocks less shiny then the rest of the top, but shinier then the edges.
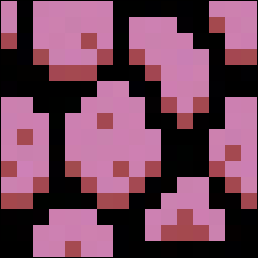
Next is the Specular Color map:

The Specular Color map controls the color of the shininess that the Specular map creates, so instead of everything having a white shine to it, you can give gold a golden shine, or in this instance, the top of the rocks a pinkish shine with reddish under tones.
There is another type of map called the Alpha map, it is a gray scale image that controls how visible a texture is, pure white areas are completely visible, black areas are completely invisible, gray areas are semi-visible. I didn't use an Alpha map in the shader test so I don't have an example.
And finally there is the Shader its self, the Shader is not an actual texture, you can think of it sorta like a recipe and all the maps I've shown you ingredeants, the Shader tells the game how to make a texture look by combining all the above maps together to make some thing amazing.
This concludes our lesson for the day, I hope you learned something new.


3 comments:
Wow this should rly help me with my modding for jk3.
Could do shaders just never rly got what each thing did.
Thx
Moog
Althoug I do think the bump maps look kinda neat, you have to remember that they would have to be viewed from all sides (like when the point of view changes in narrow areas).
the way the textures are rendered now they will only appear 3d when viewed from the south.
Of course the textures where never ment to be viewed from all sides (edges only to the south), so for a "real" 3d look they would have to be modified too, wich would kind of affect the intended retro look...
I would just skip the bumpmaps if I were you, but it's your project, so go ahead and find a solution! ;)
@Anon
It doesn't matter if the bump maps are only 3d in one direction if the view is always from south to north and I don't believe it would be much of a problem to keep the camera always south to north oriented.
Post a Comment